
Building templates in Bluepic Studio
Design a template visually in Bluepic Studio — elements, expressions and input fields — then find its ID and drive it from your own code with a single POST /api/render call.
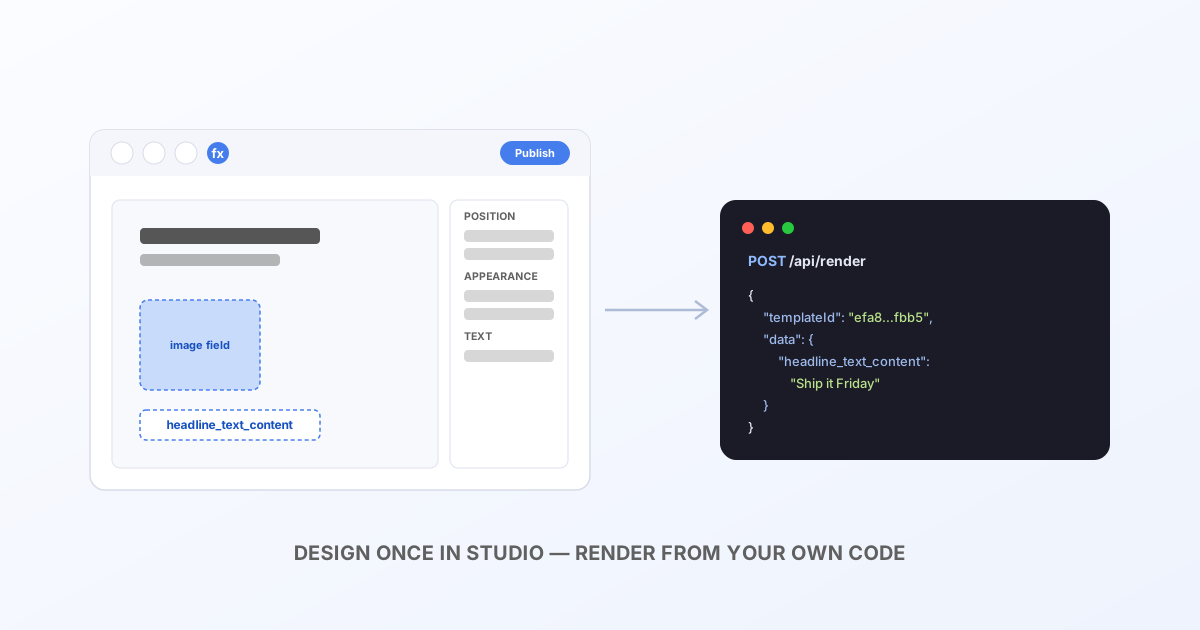
Design once, render forever
Bluepic Studio is where the actual design work happens — the layout, the fonts, the exact pixel a logo sits at. Everything downstream (the render API, batch jobs, personalization) just fills in values on a template you already built visually. You never hand-write the JSON a template is made of; Studio is the editor for it.
This guide covers the Studio side specifically: creating a template, wiring up the parts that should change per-render, and finding the ID your code needs. If you're looking for the raw-IDML path instead — importing an existing InDesign file without touching Studio's canvas — see Automate InDesign projects.
Create a template
From the templates view, Create Template opens three starting points:
- Empty Template — a blank canvas at a size you pick.
- Presets — common starting layouts.
- Import from IDML — bring in an existing InDesign export as an editable Studio template, rather than rendering it raw.
Pick a size from the aspect-ratio grid (square, portrait 4:5, story 9:16, and a handful of others), or set exact dimensions — this is the pixel size every render comes back at unless a request overrides width/height.
The editor
The canvas works like any layered design tool — text, image, shape, and pen tools on the toolbar, a layers panel on the right, and a property panel on the left for whatever's selected: position and size, fill and stroke, opacity, and (for text) content, font, size and alignment.
The part that matters for automation is the fx expression icon in the toolbar. Any numeric property — position, size, rotation, opacity — can be bound to an expression instead of a fixed number, and an expression can repeat one element a computed number of times: a rectangle whose count is body.lines.length, say, drawn once and multiplied automatically at render time. Design the element once; let the expression handle "one per line," "one per row," or "one per item in the data" — see the live example on the homepage for exactly this pattern.
Connect input fields
Add Input Field, then click the element you want to expose. That element's editable property (its text content, its image source, sometimes its fill color) becomes a named field — the name you give it here is the exact key your API request's data object uses later:
{
  "templateId": "efa8ff2c-262b-4488-b8cf-e01521c6fbb5",
  "data": {
    "headline_text_content": "Ship it Friday",
    "avatar_image": { "src": "https://cdn.example.com/avatar.jpg" }
  }
}
Show Input Fields toggles a preview of every field you've wired up so far, letting you check names and defaults before you publish. Anything you don't expose as a field stays fixed — logos, backgrounds, decorative shapes never need a field at all.
Publish, and find your template ID
Publish makes the template renderable via the API. The ID itself is simpler than a separate "copy ID" step: it's the UUID already sitting in your browser's address bar while you're editing —
https://bx-studio.bluepic.io/editor/efa8ff2c-262b-4488-b8cf-e01521c6fbb5
                                       └──────────────── templateId ────────────────┘
— the same string goes straight into templateId on a POST /api/render call.
Sharing URL vs. the API
Studio's settings panel (the gear icon next to Publish) also offers a Sharing URL — a public, no-code page where anyone can fill in the fields and export an image by hand, useful for handing a template to someone who isn't writing code at all. That's a different mechanism from calling /api/render directly: the sharing URL is for a human filling in a form once; the API is for your own backend rendering the same template hundreds of times from data it already has. Both read the same published template and the same input fields — pick whichever matches who's actually triggering the render.
Next steps
- API reference — the exact request shape for
/api/render, once you have atemplateId. - Try it immediately with the demo template in the interactive playground.
- Need the raw-IDML path instead of designing in Studio? See Automate InDesign projects.